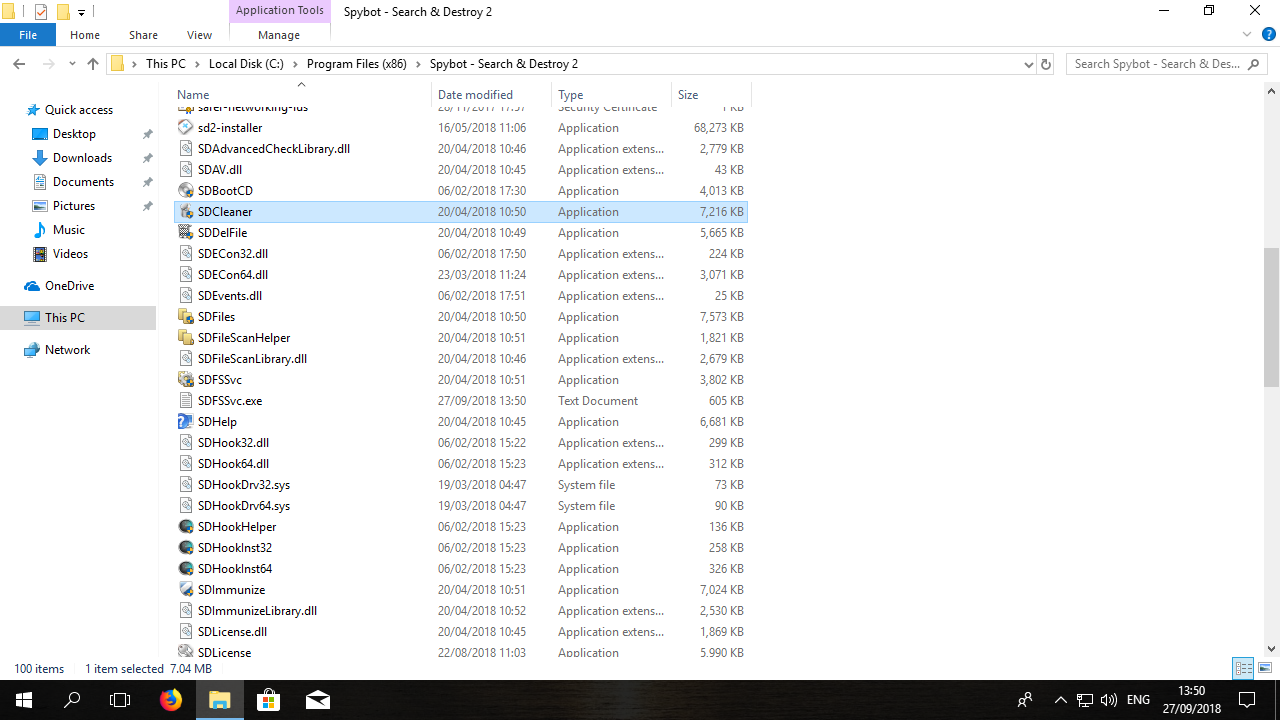
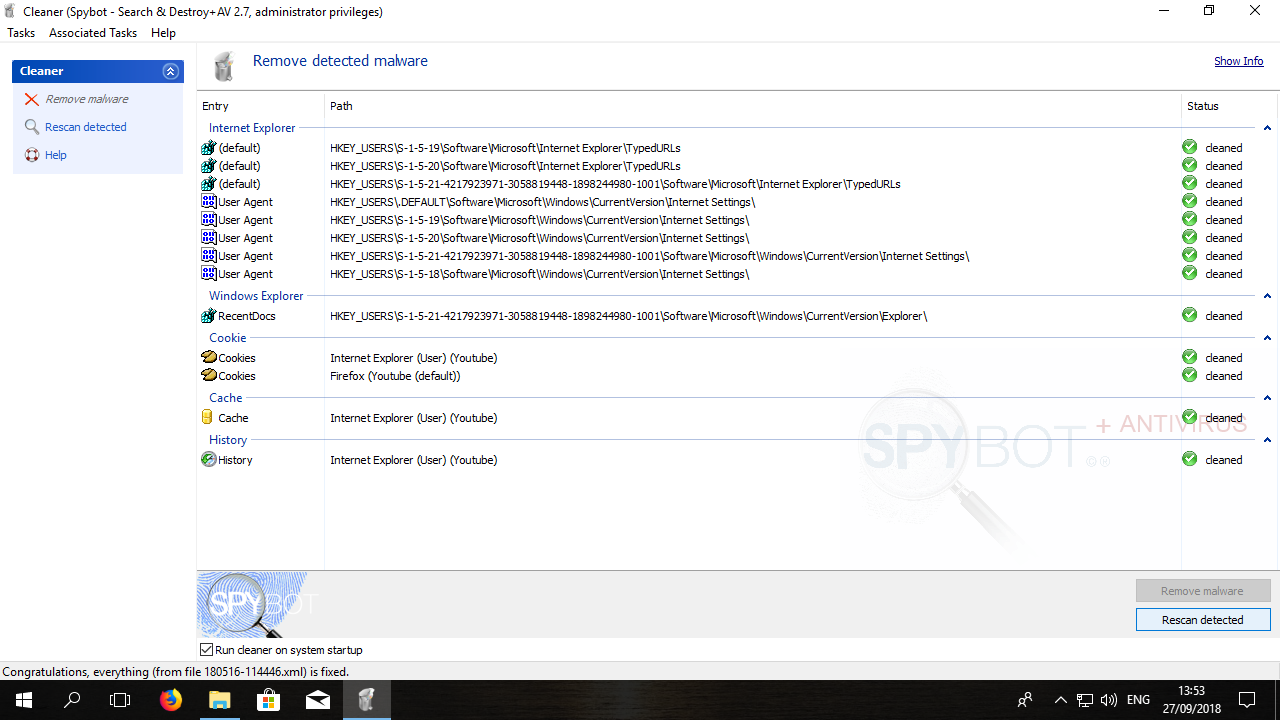
If the detected items were not removed by a System Scan, you can try to remove them again by running SDCleaner manually.
To open SDCleaner:
- Navigate to the Spybot – Search & Destroy program folder:
for 32-bit PCs:
C:\Program Files\Spybot - Search & Destroy 2\
for 64-bit PCs:
C:\Program Files (x86)\Spybot - Search & Destroy 2\

- Right-click the file SDCleaner.exe, file and choose the option to Run as Administrator.
- If the unremoved item is present in this list and it is not listed as “cleaned” you can select it and click on Remove Malware.
- If you wish to scan again, click on Rescan Detected. This will open up the System Scan Window and scan for all the items that were previously detected in a scan.

- When the scan is finished you can select Fix Selected in the System Scan window.
Alternatively, you can try a scan in Safe Mode as the malware could be affecting the removal process.
To do this:
- Reboot your PC. As it is restarting, hold F8 until a boot menu appears.
- In the boot menu, choose Safe Mode with Networking.
- You can then open Spybot – Search & Destroy as an administrator in this mode and perform another scan.
- Open Spybot by right-clicking on the Spybot – Search & Destroy icon and choosing the option to Run as administrator.
- Click on Scan System.
Once you have scanned using Spybot – Search & Destroy, restart your machine through the Shutdown options.
Please see the links below for more information on entering Safe Mode:
